
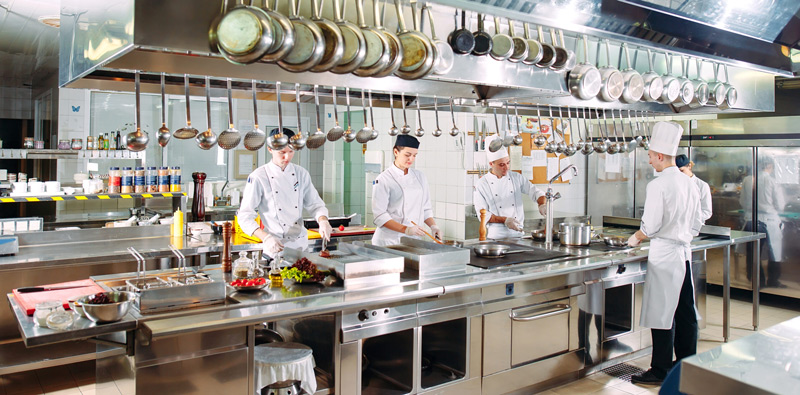
Hygienic Infrastructure: Modern Commercial Kitchen Epoxy Flooring
Are you operating a restaurant, catering facility, or commercial prep space and searching for the ultimate surface upgrade? Look no further. High-volume kitchens endure constant physical and chemical exposure—from boiling oil splatters and dropped heavy cookware to aggressive daily sanitisers. Choosing specialised commercial kitchen epoxy flooring provides the seamless, resilient barrier required to protect your concrete slab while keeping your workplace fully compliant with Australian health regulations.
Because the hospitality sector operates under strict sanitation standards, traditional ceramic tiles with eroded grout lines no longer suffice. Incorporating specialised food service industry flooring ensures your facility remains hygienic, safe, and easily cleanable under high-stress operating conditions.
Benefits of Using Epoxy Flooring in Commercial Kitchens
1. Exceptional Durability Under Heavy Traffic
High-performance resin systems deliver true durable flooring capable of withstanding constant foot traffic, heavy rolling stainless carts, and localised impacts. Unlike timber or floating laminate surfaces, heavy-duty epoxy resists mechanical wear and will not chip or crack under everyday kitchen operations.
2. Certified Slip Resistance for Wet Preparation Zones
Water, fats, and cooking oils create severe trip and slip hazards for staff during busy service hours. Professional resin installations incorporate graded aggregate broadcasts (such as aluminium oxide or quartz) to deliver certified slip resistant flooring (achieving up to R11 or P4/P5 ratings under Australian Standards AS 4586). This essential traction protects kitchen personnel without creating deep crevices that trap grime.
3. Impermeable, Bacterial-Resistant Barrier
A seamless, non-porous surface prevents liquids, animal fats, and organic juices from penetrating into the concrete beneath. By eliminating seams and grout lines, commercial kitchen epoxy flooring denies bacteria like Listeria and Salmonella the moist environments they need to multiply, making health inspection audits worry-free.
4. Streamlined Epoxy Flooring Maintenance
Kitchen managers appreciate how simple daily cleaning becomes with resin surfaces. Proper epoxy flooring maintenance requires only routine sweeping and mopping with neutral floor cleaners. Because the surface does not absorb stains or oils, your team spends less time scrubbing and zero money on periodic waxing or floor stripping.
Key Factors When Choosing Commercial Kitchen Epoxy Flooring
Selecting the ideal resin system for your facility requires balancing several key technical variables:
1. System Composition (100% Solids vs Polyurethane Cement)
While high-build 100% solids epoxy works exceptionally well for dry storage, dishwashing zones and high-heat washdown lines often benefit from DiamondCrete PU Cement, which handles extreme thermal shock up to 120°C.
- Application Fit: Use 100% solids epoxy for dry pantries, coolrooms, and dry prep; opt for PU cement under fryers, tilt pans, and commercial dishwashers.
- Thermal Limits: Standard epoxies soften above 60°C, whereas heavy-duty polyurethane cement handles steam cleaning and direct boiling spills without delaminating.
2. Thickness and Build (3mm to 6mm)
Heavy equipment and thermal cycling demand thicker trowel-applied or heavy-build coatings (typically 3mm to 6mm) rather than thin roll-on paints.
- Impact & Load Profile: Thin 1mm paint coatings chip when metal pans or gas cylinders drop; 6mm slurry systems absorb point-load impacts safely.
- Drain Transitions: Thicker trowelled profiles allow applicators to slope floor levels smoothly toward trench drains, eliminating standing water pools.
3. Surface Texture and Profile
Choosing the right aggregate density ensures the floor maintains high traction when wet while remaining smooth enough for squeegees and mops to glide during cleanup.
- Zone-Specific Aggregates: Specify coarse aluminium oxide aggregate for raw wash zones and finer quartz broadcasts for dry assembly stations.
- Mopability Balance: Over-aggregating makes floors hard to clean; professional application seals particles just enough to leave micro-traction points.
4. Colour and Aesthetic
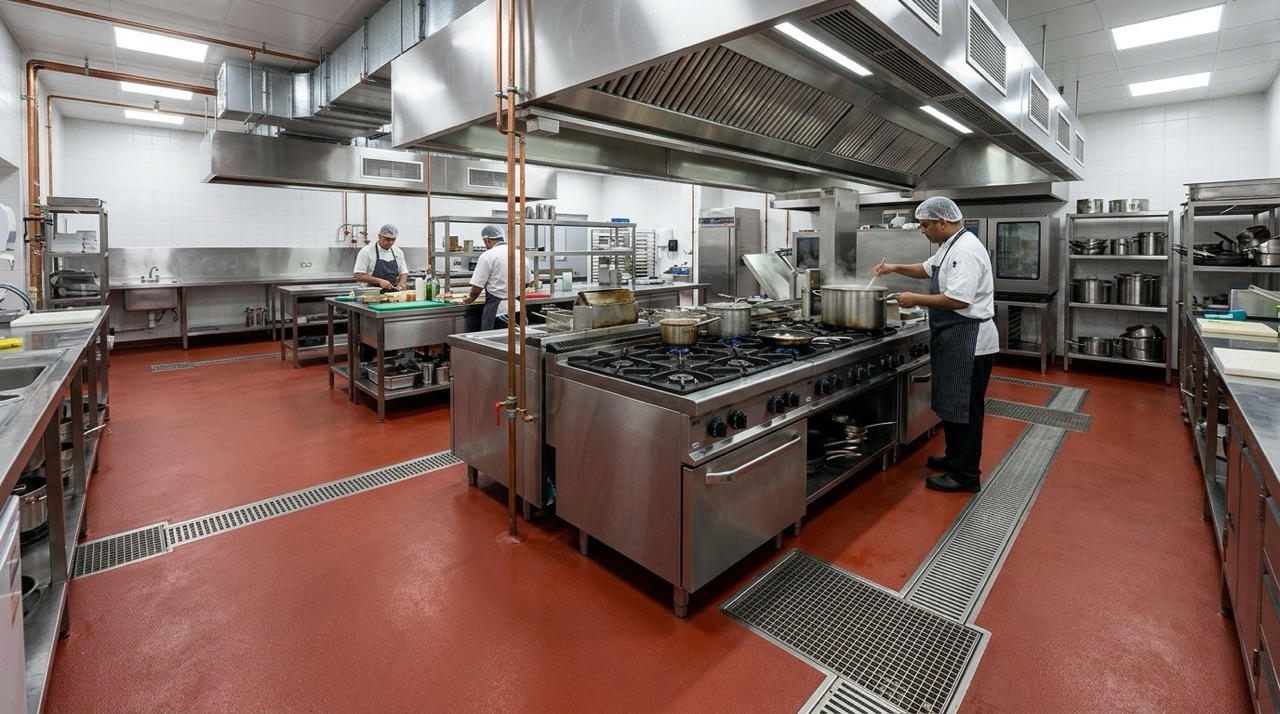
Light grey, sandstone, or terracotta finishes enhance visibility, making it easier for staff to spot debris, while lighter colours reflect ambient overhead light to brighten the working environment.
- Hygienic Contrast: Light-coloured finishes reveal fallen food scraps and liquid spills instantly before they become foot-track hazards.
- Light Reflectance: Lighter flooring reduces shadow zones beneath stainless benches, helping lower overall artificial lighting requirements.
5. Radius Wall Coving
Installing continuous resin coving up the wall-to-floor junction eliminates 90-degree corners, ensuring washdown water drains freely into drainage channels.
- Sanitation Compliance: Meets Australian Food Safety Standard 3.2.3 by eliminating the 90° wall joint where grease and food particles hide.
- Height Specifications: Typically installed 100mm to 150mm up the wall lining to create a fully waterproof basin during end-of-shift washdowns.
6. Total Lifecycle Cost
Investing in commercial-grade materials and professional mechanical concrete floor preparation yields significant long-term savings by eliminating frequent structural repairs.
- Downtime Prevention: Avoiding a single emergency floor shutdown during peak trading season pays for the upfront cost of trade-grade installation.
- Long-Term Value: Properly prepared industrial resin floors last 10 to 15+ years, outperforming short-lived roll-on sealers by a factor of three.
System Types for Foodservice Environments
Depending on your layout and operational temperature profile, Diamond Grind applies several specialised systems:
1. Self-Levelling Epoxy
Provides a smooth, high-build, seamless finish ideal for assembly lines, dry storage, and walk-in pantries.
2. Mortar & Heavy-Duty Slurry Systems
Blends aggregate into high-strength resins for high-impact zones, dishwashing stations, and heavy equipment lines.
3. Antimicrobial Polyurethane Cement
Integrates silver-ion matrix technology to actively inhibit microbial growth, offering maximum defence in abattoirs and hot-wash kitchen environments.
4. Decorative Quartz Epoxy
Combines coloured quartz granules with clear epoxy topcoats for front-of-house commercial kitchens or open display cooking areas where visual appeal matters as much as hygiene.
Step-by-Step Installation Process
A flawless installation relies heavily on trade expertise and surface preparation:
1. Mechanical Diamond Grinding & Shot Blasting
Opens concrete pores and removes existing coatings to establish an ICRI Concrete Surface Profile (CSP) for maximum mechanical bonding.
- Target Surface Profile: Aims for a CSP 3–5 profile to give liquid resin deep physical anchors within the concrete slab structure.
- Contaminant Removal: Strips old acrylic sealers, grease contamination, and weak laitance layers that would otherwise cause peeling.
2. Substrate Repair & Keyway Cutting
Fills existing cracks and cuts anchor keyways around drains and perimeters to lock the resin into the slab.
- Keyway Engineering: 6mm x 6mm anchor grooves cut around drains and doorways prevent system edges from rolling under heavy loads.
- Joint Patching: Fills dynamic cracks with high-tensile epoxy mortars to prevent structural movement from mirroring through the topcoat.
3. Moisture Barrier & Primer Application
Seals the substrate against outgassing and rising damp.
- Outgassing Control: Deep-penetrating primers stop concrete air pockets from expanding and creating pinholes in the main body coat.
- Moisture Mitigation: High-solids primers tolerate up to 80%+ relative humidity in ground slabs, preventing future hydro-static blistering.
4. Body Coat & Aggregate Broadcast
Applies the main resin layer and broadcasts anti-slip quartz or aluminium oxide to achieve specified traction ratings.
- Full-Refusal Broadcast: Aggregates are thrown into the wet body coat until saturation, guaranteeing uniform texture across high-wear zones.
- Custom Slip Ratings: Aggregate sizing is calculated specifically to meet AS 4586 compliance without creating impossible cleaning surfaces.
5. Protective Topcoat & Rapid Curing
Seals the aggregate with a chemical-resistant topcoat, allowing rapid return-to-service for your kitchen team.
- Chemical Armour: Encapsulates aggregate with UV-stable and chemical-resistant topcoats to block hot oil, acid, and alkaline erosion.
- Fast Turnaround options: Fast-cure topcoats achieve full mechanical hardness within 12 to 24 hours for minimal kitchen downtime.
Best Practices for Epoxy Flooring Maintenance
Establishing effective daily cleaning habits protects your investment and maintains anti-slip performance over time:
1. Daily Cleaning Protocol
Sweep loose food particles daily before mopping with warm water and a neutral pH commercial detergent. Avoid acidic or caustic floor strippers, which can dull the protective clear coat over time.
2. Scheduled Deep Washdowns
For greasy line areas, use a soft-bristle deck broom combined with a non-abrasive degreaser. Scrub gently, rinse thoroughly with clean water, and squeegee excess water into drains to prevent soap residue buildup.
Secure Your Facility with Diamond Grind
Whether you are upgrading a boutique restaurant or outfitting an industrial catering plant, Diamond Grind supplies certified, high-performance flooring solutions across Sydney and regional NSW. Contact our specialist team today for a tailored site assessment and competitive estimate.
FAQ,s

How long does commercial kitchen epoxy flooring take to cure before we can reopen?
Standard 100% solids epoxy systems generally require 24 to 48 hours for a full cure before foot traffic can resume. However, specialized fast-curing polyurethane cement or polyaspartic systems can cure in as little as 6 to 12 hours. This allows commercial kitchens to schedule installations overnight or over a quiet weekend with minimal operational downtime.
What slip-resistance rating is required for Australian commercial kitchens?
Under Australian Standards (AS 4586), commercial kitchen floors must meet an anti-slip rating of R11 to R12 (oil-wet ramp test) or P4 to P5 (wet pendulum test). Professional installers broadcast graded aggregates, such as aluminium oxide or quartz, into the wet body coat to meet these certified safety ratings without compromising cleanability.
Why is radius wall coving necessary in food prep spaces?
Radius coving creates a seamless, curved transition where the floor meets the wall, completely eliminating sharp 90-degree corners. This prevents water, grease, and food particles from accumulating along baseboards, allowing washdown water to drain freely and ensuring full compliance with Australian health codes (FSANZ).
How do you clean grease build-up from non-slip epoxy floors?
Daily maintenance requires sweeping followed by mopping with warm water and a neutral pH commercial degreaser. For heavy grease buildup in hot line areas, use a soft-bristle deck broom to agitate the floor, rinse thoroughly with clean water, and use a floor squeegee to push excess water toward drains. Avoid harsh solvent strippers or abrasive steel brushes, which can dull the topcoat over time.
✅ Let's Talk — DiamondGrind
100% free consultation — no commitment required.